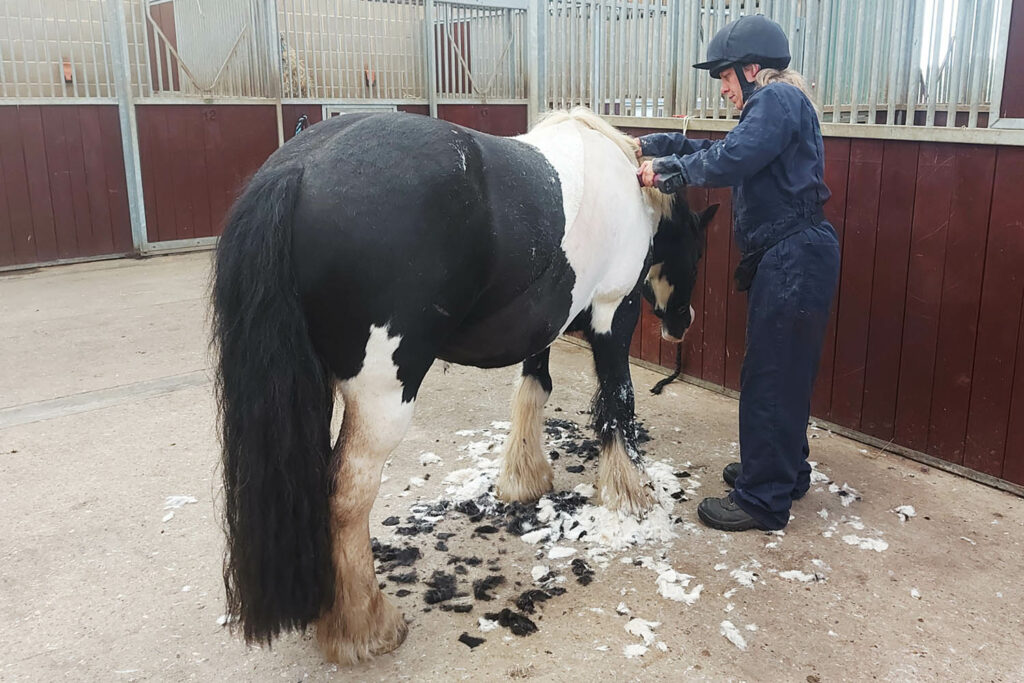
Even with well-handled horses, it’s important to divide the process of getting them used to clippers into small steps, to give your horse the best chance of success. Bear in mind that it may take several sessions to get them comfortable with clippers, so it’s best to start this process well in advance of when you plan/need to clip your horse.
When introducing a horse to clippers, you need to ensure that you reward the behaviour you want, and that you don’t inadvertently reinforce a behaviour you don’t want. The ultimate aim is for the horse to want to stand calmly to be clipped. Training a horse to be clipped can be achieved by pairing it with something the horse finds enjoyable to modify their behaviour. In this case, the behaviour you want is standing still and calm when being clipped. By marking the behaviour of standing still (with a clicker or verbal cue) and then giving the horse a food treat (e.g., piece of carrot) when they stand still the behaviour is being positively reinforced. Another option is to remove the clippers when they stand still. This is known as negative reinforcement – you are removing the clippers to reward them for standing still. Timing is key for both positive and negative reinforcement. For more information on how horses learn, and suitable training methods see our Training: how do horses learn? page.
Breaking clipping into manageable steps
Throughout this process, only move onto the next step when your horse is totally comfortable with the current one. If at any point your horse finds it difficult to cope, go back however many steps you need to until they are not just coping but looking calm and relaxed again. You’ll then need to progress at a slower rate to make sure they remain comfortable at every stage. The steps we divide the process into are:
- Turn the clippers on outside your horse’s stable/across the yard to assess their reaction to the noise. Ideally, you will be far enough away that they don’t react, and you can then reinforce them for standing still by turning the clippers off (negative reinforcement) or giving some of your chosen food reward (positive reinforcement) – or both at the same time (combined reinforcement). If you decide to use food as a reward, you may need to enlist a helper for this whilst you’re across the yard!
- If your horse does react to the clippers being turned on, you can pair the noise of the clippers with food. Turn the clippers on and then give the horse a small handful of feed then turn them off. Repeat this until as soon as you turn the clippers on the horse looks for the food and is calm. If the horse is too fearful to want to take food from your hand start off with a smaller pair of clippers or even beard trimmers.
- Once they’re confident with the clippers being turned on at a reasonable distance (i.e., they ignore it/don’t react), gradually decrease the distance and repeat the process until they’re happy for you to stand next to them with the clippers turned on.
- Show them the clippers – turned off – and allow your horse to touch them with their muzzle, if they want to. You can also place the clippers turned off on your horse’s shoulder and gently stroke them with them. If your horse fidgets for a second just wait for them to relax and then remove the clippers (negative reinforcement), but if they look worried you need to break it down into easier-to-achieve steps.
- Ensure you can stroke the horse with the clippers (turned off) anywhere on their body you want to clip, but stroke in the same direction of the hair rather than against it as you would do when clipping.
- Stroke your horse’s shoulder with one hand whilst you turn on the clippers with the other. The clippers should be held down by your side, away from the horse. If you are pairing the clippers with feed, you can stop stroking to use that hand to give the horse some feed, or even pop it in a bucket in front of them.
- The next step is to check how your horse reacts to the vibration of the clippers. Check you have your horse’s attention at this point, as it could be quite startling for them to have the clippers turned on again if their attention is elsewhere. Holding the clippers in the hand farthest away from the horse, turn them on and then put your other hand flat on the horse’s shoulder, before placing the back of the clippers on your arm close to your elbow. If they remain calm, slide the clippers down so that they rest on the back of your hand. Again, reinforce your horse (whether with food, the removal of the clippers, or both) when they stand still. As before, make sure you move with your horse if they fidget, otherwise they will learn that the way to remove the clippers is to move, whereas you want them to learn to stand still. However, if your horse appears worried remove the clippers and break the process down into easier-to-achieve steps.
- Once your horse is comfortable with the clippers placed on top of your hand, you can place the clippers (turned on) directly onto their shoulder, but without clipping any coat yet. Stroke the horse with the clippers in the same direction as their coat lies.
- You can then repeat the step above for all the areas you’re intending to clip, always making sure to reward when the horse is standing calmly. At this stage you may turn the clippers on and then put some feed or a lick in a bucket in front of them to enjoy whilst you do this. By giving the food after you have turned the clippers on you are helping to form a positive association.
- Once they’re comfortable with both the noise and the vibration of the clippers, you can try clipping a small patch on their shoulder. Most horses will remain calm if you have prepared them for this. Remember that for many horses, it will be necessary to complete this process over several sessions, so don’t expect to go all the way through the steps on the same day. It’s better to spend a few minutes over several days to build up their confidence, and always recap what you have done in previous sessions to make sure they are comfortable, rather than jumping in at the next step.
Depending on how your horse copes, you may find that you need to do their first clip in stages to help them get used to the idea. So, you could clip their chest one day, then the underside of their neck another, and so on. Don’t worry if this is the case – it’s much better to make sure they have a positive experience than it is to be determined to complete the whole clip in one go. You might think it looks odd to have patches clipped at a time, but the horse won’t mind, and in the long run this approach should pay off and make clipping a much less stressful process for both you and your horse.

Clipping a horse urgently for medical reasons
It’s worth bearing in mind that if you have a horse who’s not comfortable being clipped or who hasn’t been clipped before, and you need to clip them urgently for a medical reason – for example, they have a thick coat and you need to treat a skin condition or a wound – it may be safest to have the horse sedated by a vet. This should make clipping much safer and less stressful for everyone involved and allow the treatment to be provided safely and effectively. Clipper training can always be done another day when horse and handler are both calm and there’s no time pressure.
Sedating in these circumstances then gives you several weeks to train them to enjoy the process before you need to clip them again. However, repeatedly sedating a horse to be clipped is not advised as it often results in the horse becoming needle shy. They associate an injection with clipping which they still find aversive but are too sleepy to be able to avoid it.
If you have tried to follow the steps above but are struggling it is worth getting help from an accredited behaviourist. Not only will you have a much happier horse, but it is much cheaper in the long run than repeated sedation.
Safety considerations when clipping
It is important to take appropriate measures to ensure you, your horse and any helpers are kept safe whilst clipping. Ensure that you and any helpers are in appropriate personal protective equipment such as a riding hat and suitable footwear. Ensure the environment is safe, including even flooring (ideally rubber matted or anti-slip concrete), the workspace is tidy and there is enough space to ensure the clipper cord can be safely kept out of the way. If corded clippers are used, then ensure the plug has a circuit breaker installed in case of an electrical malfunction. Check the temperature of the clipper blades throughout the process and remember to oil them regularly to prevent overheating. If they are getting hot, take a break.
Clipping clean, dry coats with sharp clipper blades will make the process a lot smoother. Remember to fully clean your clippers after each use. Send blades for resharpening and have your clippers serviced as necessary.
Don’t be afraid to ask for help from someone more experienced, especially if you are still in the process of training your horse to get used to the clippers.
Popular advice in Behaviour

Separation anxiety: training your horse to be on their own
Not sure how to prepare your horse to be left on their own or have a horse with separation anxiety? Check out our top tips.

Introducing a new horse to a herd
Bringing a new horse home or looking to change arrangements within an existing herd? Check out some of the possible approaches.
Other advice categories
All webinar categories:
Call our Advice Line
+44 (0)1953 497 238Not found the advice or answer you were looking for here? Then our Advice Line is available during office hours, or you can email us on [email protected] to let us know what topics you were looking for.


